Table of Contents
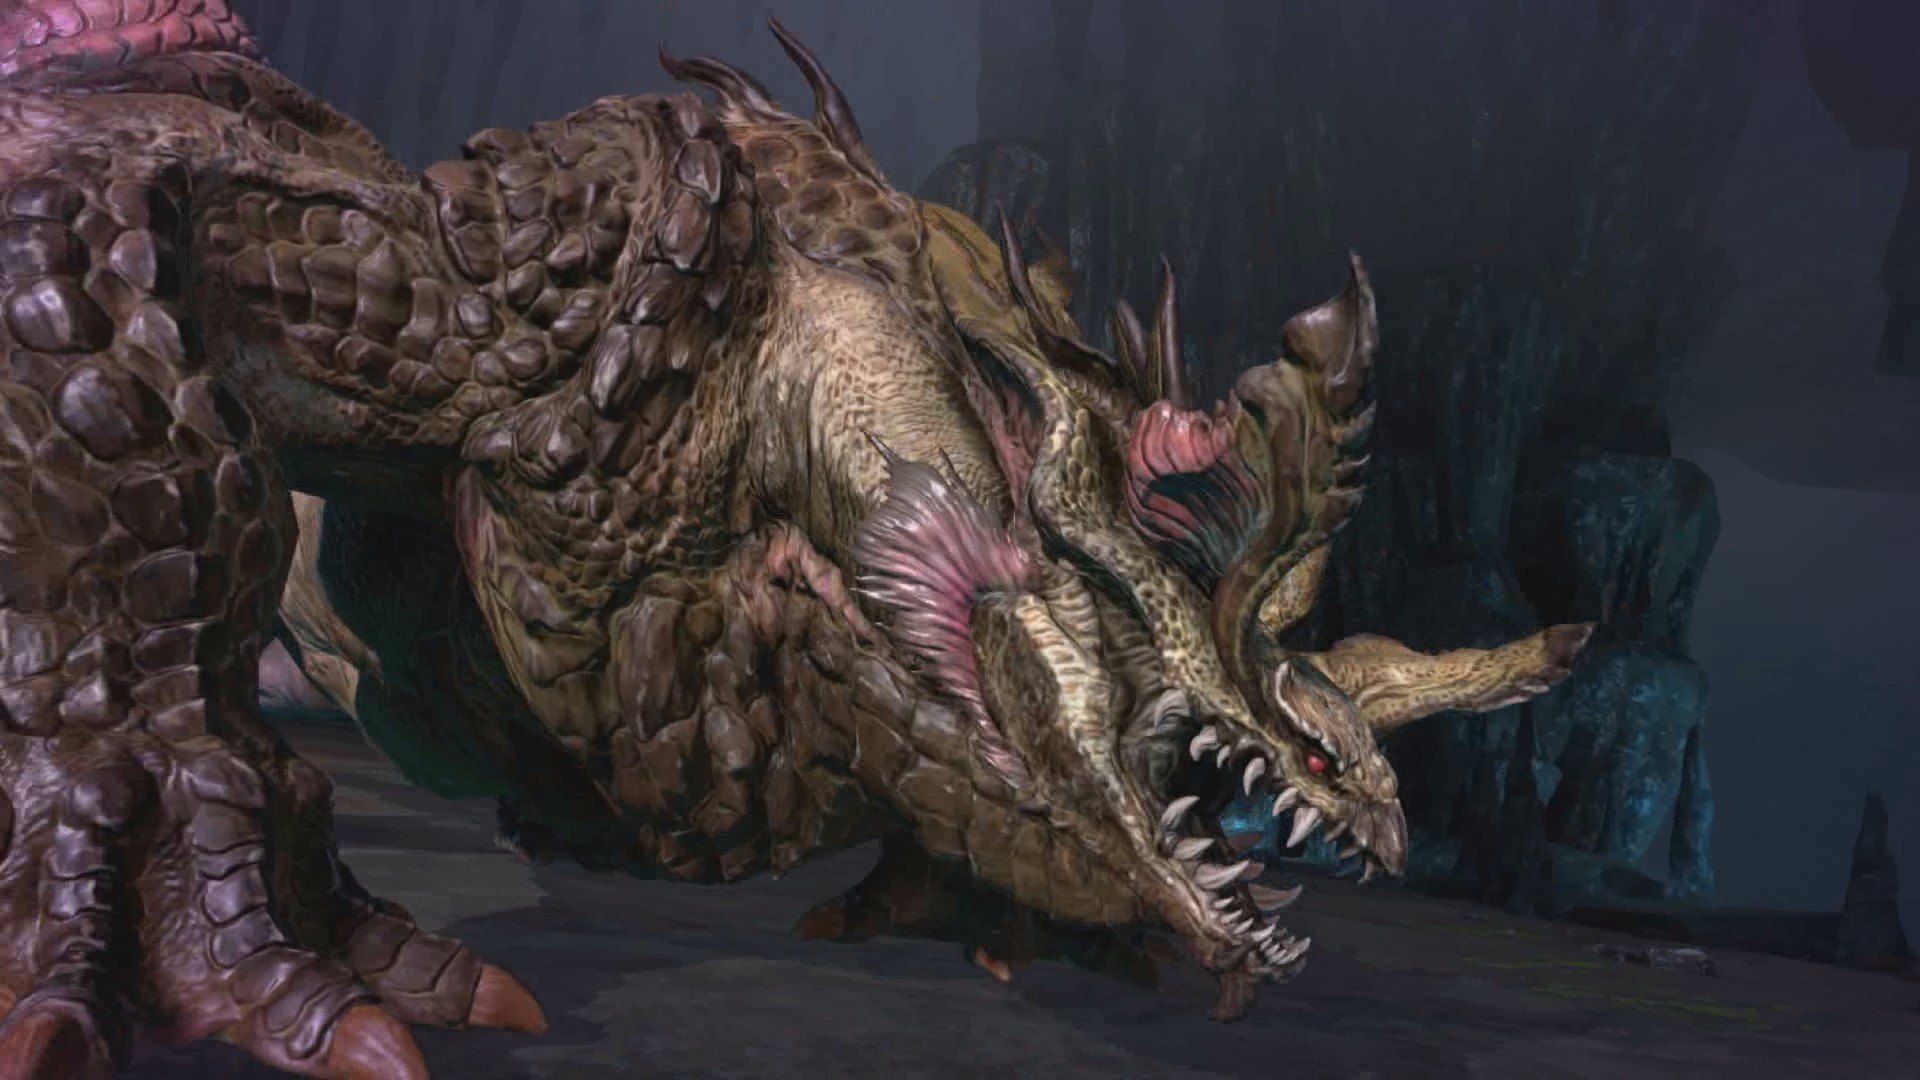
Final Fantasy Ever Crisis' Sunsín Cave's Very Hard Crisis Dungeon is a tricky one. The final boss, Reno, is weak to ice, but the rest of the enemies are vulnerable to fire and lightning. Building a competent party to tackle the dungeon will be a challenge due to the mixed elements. Fortunately, we're here to assist you in navigating through this challenge and provide optimal strategies to achieve that sought-after S+ rank.
Team Composition
Sephiroth or Tifa, equipped with their respective Ice Arcanum gear, make perfect units to bring into the dungeon as damage dealers. You can opt for one or bring both into the party. Tifa, apart from dealing significant ice damage, can debuff defenses with her Limit Break and even provide healing while disrupting enemy offenses. Sephiroth can also debuff offenses using the Kuja Sword if you have it.
To ensure the party's survival, consider bringing one of the three AoE healers: Aerith, Matt, or Red XIII. Aerith stands out as the best choice due to her ability to debuff defenses with the Sun Umbrella while serving as the primary healer. Matt follows as the next best healer with his defense-breaking capabilities, albeit being less versatile. Lastly, Red XIII can cast Regen on the party, although it's not as effective compared to the direct heals of the other two.
To complete the party setup, introducing a sub DPS like Lucia can be beneficial. Lucia has the ability to debuff ice resistance with her Bald Eagle weapon, allowing her to deal significant ice damage as well. Additionally, her weapon includes a support materia slot that boosts the ice damage modifier by 30%.
Enemy Info
Scorpion Sentinel [Level 80]

[HP: 234357] [PATK: 9831] [MATK: 9831] [PDEF: 100] [MDEF: 100] [HEAL: 0]
Damage Resistances: None
Elemental Resistances: 80% Fire, -100% Ice, -100% Lightning
Immunities: Poison, Silence, Darkness, Fatigue, Fog
Description:
Uses the powerful magic attack Tail Laser. Also uses a wide variety of stream phase skills, such as Counter Mode to unleash counterattacks, or Target Scanner to focus attacks on a single target.
Quickly destroying sigils is an effective strategy.
Abilities:
Physical Damage:
- Type-98 Cannon
- Description: 80% Phys. Non-elem. Damage [Range: Single Enemy]
- Debilitating Cannon
- Description: Various percentages of Phys. Non-elem. Damage [Range: Single Enemy]
- Effects:
- 30% Phys. Non-elem. Damage └ 120s MDEF Down (+120s) (Low -> Extreme)
- 40% Phys. Non-elem. Damage └ 300s MDEF Down (+300s) (Mid -> Extreme)
- 50% Phys. Non-elem. Damage └ 300s MDEF Down (+300s) (High -> Extreme)
- Effects:
- Description: Various percentages of Phys. Non-elem. Damage [Range: Single Enemy]
- Fire Missiles
- Description: 150% Phys. Fire Damage [Range: Single Enemy]
- Fire Missiles A
- Description: 100% Phys. Fire Damage [Range: All Enemies]
- Mark 99 Launchers
- Description: Varying percentages of Phys. Non-elem. Damage [Range: All Enemies]
Magical Damage:
- Tail Laser
- Description: Varying percentages of Mag. Non-elem. Damage [Range: Single Enemy]
- Effect: Reset Resistances [Range: Self]
- Description: Varying percentages of Mag. Non-elem. Damage [Range: Single Enemy]
- Tail Laser A
- Description: 400% Mag. Non-elem. Damage [Range: All Enemies]
- Missile Barrage Mode
- Effect: Permanent Buff Effect: +50% PATK, -25 PDEF, -25 MDEF [Range: Self]
- Target Scanner
- Effect: Initiates phases leading to different attacks
- Blockade Wall
- Effect: Initiates phases with resistance changes
- Counter Mode
- Effect: Initiates counter mode phases
Other Abilities:
- Ready Missile
- Description: Initiates a phase for Mark 99 Launchers [Range: Self]
- Counter Mode: Off
- Description: No Effect
Sahagin Prince [Level 80]

[HP: 135153] [PATK: 9831] [MATK: 2457] [PDEF: 100] [MDEF: 100] [HEAL: 0]
Damage Resistances: None
Elemental Resistances: -100% Fire, 80% Water
Immunities: None
Description:
Frequently grants self ATK Up with Amp Up. Grants all allies ATK Up, DEF Up, and MDEF Up with Declaration of War.
Abilities:
Physical Damage:
- Harpoon
- Description: 60% Phys. Non-elem. Damage [Range: Single Enemy]
- Water Gun
- Description: 100% Phys. Water Damage [Range: Single Enemy]
- Spray
- Description: 70% Phys. Water Damage [Range: All Enemies]
- Jump
- Description: Varying percentages of Phys. Non-elem. Damage [Range: Single Enemy]
Magical Buffs:
- Amp Up
- Description: Increases PATK for a duration
- Effects:
- 60s PATK Up (+60s) (Low -> Extreme) [Range: Self]
- 120s PATK Up (+120s) (Mid -> Extreme) [Range: Self]
- 180s PATK Up (+180s) (High -> Extreme) [Range: Self]
- Effects:
- Description: Increases PATK for a duration
- Declaration of War
- Description: Increases PATK for allies and self, along with PDEF and MDEF
- Effects:
- 600s PATK Up (+600s) (Low -> Extreme) [Range: All Allies]
- Permanent Buff Effect: +30% PDEF, +30% MDEF [Range: Other Allies]
- 600s PATK Up (+600s) (Low -> Extreme) [Range: All Allies]
- Permanent Buff Effect: +75% PDEF, +75% MDEF [Range: Other Allies]
- 600s PATK Up (+600s) (Low -> Extreme) [Range: All Allies]
- Effects:
- Description: Increases PATK for allies and self, along with PDEF and MDEF
- Royal Resolve
- Description: Provides PATK increase, cancels PATK Down effect, and grants a temporary PATK boost
- Effects:
- Varying durations of PATK Up (+PATK) (Low/Mid/High -> Extreme) [Range: Self]
- Permanent Buff Effect: +20%/40%/60% PATK [Range: Self]
- Varying durations of PATK Up (+PATK) (Low/Mid/High -> Extreme) [Range: Self]
- Effects:
- Description: Provides PATK increase, cancels PATK Down effect, and grants a temporary PATK boost
Royal Stance:
- Begins a phase leading to the "Jump" ability, providing PATK Up effects based on the duration.
Gallonbaloir [Level 80]

[HP: 234876] [PATK: 9831] [MATK: 9831] [PDEF: 100] [MDEF: 100] [HEAL: 0]
Damage Resistances: None
Elemental Resistances: -100% Fire, 80% Lightning, 80% Water
Immunities: Stun
Description:
ATK changes based on Force Gauge: Charge. The gauge can be depleted with damage. Restores own HP during stream phase Mend.
Abilities that deal great damage and buffs like DEF Up are effective against this enemy.
Abilities:
Physical Damage:
- Bite
- Description: 100% Phys. Non-elem. Damage [Range: Single Enemy]
- Shred
- Description: 200% Phys. Non-elem. Damage [Range: Single Enemy]
- Effects:
- 30s PDEF Down (+30s) (Low -> Extreme) [Range: Single Enemy]
- Effects:
- Description: 200% Phys. Non-elem. Damage [Range: Single Enemy]
- Heave
- Description: 150% Phys. Non-elem. Damage [Range: Single Enemy]
- Rake
- Description: 100% Phys. Non-elem. Damage [Range: All Enemies]
- Rush
- Description: 200% Phys. Non-elem. Damage [Range: All Enemies]
- Effects:
- 60s PDEF Down (+30s) (Low -> Extreme) [Range: All Enemies]
- Remove Permanent Buffs [Range: Self]
- Effects:
- Description: 200% Phys. Non-elem. Damage [Range: All Enemies]
- Sublime Guard
- Description: Provides defensive boosts and cancels certain debuffs
- Effects:
- Cancel Effect(s): PATK Down, PDEF Down, MATK Down, MDEF Down [Range: Self]
- 60s PDEF Up (+10s) (Mid -> Extreme) [Range: Self]
- 60s MDEF Up (+10s) (Mid -> Extreme) [Range: Self]
- Effects:
- Description: Provides defensive boosts and cancels certain debuffs
- Energy Depleted
- Description: Ends Force Gauge and inflicts stun
- Effects:
- End Force Gauge [Range: Self]
- 10s Stun (+0s) Ignores Resists [Range: Self]
- Effects:
- Description: Ends Force Gauge and inflicts stun
- Irate
- Description: Provides temporary PATK boost and debuffs defenses
- Effects:
- Permanent Buff Effect: +10% PATK, -50 PDEF, -50 MDEF [Removed on interrupt] [Range: Self]
- Begin 21s Phase ([12 ✖]) -> Rush
- Effects:
- Description: Provides temporary PATK boost and debuffs defenses
- Mend
- Description: Begins a 30s phase ([24 ✖])
Magical Damage:
- Bolt Bomb
- Description: Deals Mag. Lightning Damage with a chance to stun
- Effects:
- 80% Mag. Lightning Damage [Range: Single Enemy]
- 5s Stun (+5s) [Range: Single Enemy]
- Effects:
- Description: Deals Mag. Lightning Damage with a chance to stun
- Bolt Bomb Barrage
- Description: Deals Mag. Lightning Damage with a chance to stun to all enemies
- Effects:
- 40% Mag. Lightning Damage [Range: All Enemies]
- 5s Stun (+5s) [Range: All Enemies] [Rate: 40%]
- Effects:
- Description: Deals Mag. Lightning Damage with a chance to stun to all enemies
- Thunderstrike
- Description: Deals high Mag. Lightning Damage and inflicts stun while removing permanent buffs
- Effects:
- 500% Mag. Lightning Damage [Range: Single Enemy]
- 8s Stun (+5s) [Range: Single Enemy]
- Remove Permanent Buffs [Range: Self]
- Begin 10s Phase -> Thunderstrike
- Effects:
- Description: Deals high Mag. Lightning Damage and inflicts stun while removing permanent buffs
- Thunderfall
- Description: Deals Phys. Lightning Damage to all enemies and ends the Force Gauge
- Effects:
- 500% Phys. Lightning Damage [Range: All Enemies]
- End Force Gauge [Range: Self]
- Begin Force Gauge: Charge [Range: Self]
- Effects:
- Description: Deals Phys. Lightning Damage to all enemies and ends the Force Gauge
- Lightning Charge
- Description: Grants a permanent buff and initiates Thunderstrike
- Effects:
- Permanent Buff Effect: [Removed on interrupt] [Range: Self]
- Begin 10s Phase -> Thunderstrike
- Effects:
- Description: Grants a permanent buff and initiates Thunderstrike
Motor Ball [Level 80]

[HP: 241443] [PATK: 9831] [MATK: 9831] [PDEF: 100] [MDEF: 200] [HEAL: 0]
Damage Resistances: None
Elemental Resistances: 80% Fire, -100% Lightning
Immunities: Poison, Silence, Darkness, Stun, Fatigue, Fog, PATK Down, PDEF Down, MATK Down, MDEF Down
Description:
Uses the powerful fire-element magic attack Rolling Fire. Becomes more aggressive the more time has passed during stream phase.
Abilities:
Physical Damage:
- Focused Barrage
- Description: 100% Phys. Non-elem. Damage [Range: Single Enemy]
- Suppressive Barrage
- Description: 100% Phys. Non-elem. Damage [Range: Single Enemy]
- Effects:
- 120s PDEF Down (+60s) at varying intensities [Range: Single Enemy]
- Effects:
- Description: 100% Phys. Non-elem. Damage [Range: Single Enemy]
- Massive Barrage
- Description: 200% Phys. Non-elem. Damage [Range: Single Enemy]
- Bombardment
- Description: Inflicts Phys. Non-elem. Damage at different intensities to all enemies
- Variations:
- 180% Phys. Non-elem. Damage [Range: All Enemies]
- 250% Phys. Non-elem. Damage [Range: All Enemies]
- Variations:
- Description: Inflicts Phys. Non-elem. Damage at different intensities to all enemies
Magical Damage:
- Energy Cannon
- Description: Deals varying Mag. Non-elem. Damage to a single enemy with a chance to stun
- Variations:
- 180% Mag. Non-elem. Damage [Range: Single Enemy]
- 200% Mag. Non-elem. Damage [Range: Single Enemy] with 50% Stun rate
- 250% Mag. Non-elem. Damage [Range: Single Enemy] with 100% Stun rate
- Variations:
- Description: Deals varying Mag. Non-elem. Damage to a single enemy with a chance to stun
- Energy Sweep
- Description: Inflicts varying Mag. Non-elem. Damage to all enemies with a chance to stun
- Variations:
- 180% Mag. Non-elem. Damage [Range: All Enemies]
- 200% Mag. Non-elem. Damage [Range: All Enemies] with 30% Stun rate
- 250% Mag. Non-elem. Damage [Range: All Enemies] with 60% Stun rate
- Variations:
- Description: Inflicts varying Mag. Non-elem. Damage to all enemies with a chance to stun
- Rolling Fire
- Description: Deals escalating Mag. Fire Damage to all enemies
- Variations:
- 350% Mag. Fire Damage [Range: All Enemies]
- 550% Mag. Fire Damage [Range: All Enemies]
- 700% Mag. Fire Damage [Range: All Enemies]
- Variations:
- Description: Deals escalating Mag. Fire Damage to all enemies
- Overheat
- Description: Applies significant debuffs and ignores resistances
- Effects:
- 15s PDEF Down (+0s) (Extreme) Ignores Resists [Range: Self]
- 15s MDEF Down (+0s) (Extreme) Ignores Resists [Range: Self]
- 15s Stun (+0s) Ignores Resists [Range: Self]
- Effects:
- Description: Applies significant debuffs and ignores resistances
Buff/Phase Initiators:
- Rapid Inflame
- Description: Begins a 15s phase, leading to Rolling Fire
- Gear Boosts
- Description: Begins phases with varying durations and icons ([✖⬤] [◆])
- Variations:
- Gear Boost: Begins a 60s phase ([29 ✖⬤] [4 ◆])
- High Gear Boost: Begins a 60s phase ([33 ✖⬤] [4 ◆])
- Ultra Gear Boost: Begins a 60s phase ([37 ✖⬤] [4 ◆])
- Variations:
- Description: Begins phases with varying durations and icons ([✖⬤] [◆])
Reno [Level 80]

[HP: 206013] [PATK: 9831] [MATK: 9831] [PDEF: 100] [MDEF: 100] [HEAL: 0]
Damage Resistances: None
Elemental Resistances: -100% Ice, 80% Lightning
Immunities: Silence, Darkness
Description:
Uses many lightning-element physical attacks. Also uses Pyramid to incapacitate a single target.
Abilities:
Phys. Lightning Damage:
- Shock Swipe
- Description: 70% Phys. Lightning Damage [Range: Single Enemy]
- EM Shot
- Description: 60% Phys. Lightning Damage [Range: Single Enemy]
- Effects: 5s Stun (+2s) [Range: Single Enemy]
- Description: 60% Phys. Lightning Damage [Range: Single Enemy]
- Turk Light α
- Description: 70% Phys. Lightning Damage [Range: All Enemies]
- Beatdown, Break Rush (variations)
- Description: 80% Phys. Lightning Damage [Range: Single Enemy]
- Effects: PDEF Down at varying intensities [Range: Single Enemy]
- Description: 80% Phys. Lightning Damage [Range: Single Enemy]
- Flashstrike (multiple variations)
- Description: Ranging from 400% to 700% Phys. Lightning Damage [Range: Single Enemy]
- Flashfoot (multiple variations)
- Description: Ranging from 400% to 800% Phys. Lightning Damage [Range: Single Enemy]
- Effects: 5s Stun [Range: Single Enemy]
- Description: Ranging from 400% to 800% Phys. Lightning Damage [Range: Single Enemy]
- Electroburst (multiple variations)
- Description: Ranging from 300% to 600% Phys. Lightning Damage [Range: All Enemies]
- Electrical Charge
- Description: Initiates phases leading to Flashstrike or Electroburst
- Effects: Cancel Effect(s): PATK Down [Range: Self]
- Description: Initiates phases leading to Flashstrike or Electroburst
- Gotcha and Pyramid
- Description: Begin phases leading to Flashstrike
- Variations: Different phase durations ([5 ✖], [12 ✖], [16 ✖], [4 ✖] [3 ⬤], [6 ✖] [4 ⬤], [6 ✖] [6 ⬤])
- Description: Begin phases leading to Flashstrike
Phys. Non-elem. with Lightning Buffs:
- Turk Light β (variations)
- Description: 70% Phys. Non-elem. Damage [Range: All Enemies]
- Effects: Thunder Resistance Down at varying durations and intensities [Range: All Enemies]
- Description: 70% Phys. Non-elem. Damage [Range: All Enemies]
- Greater Voltage (multiple levels)
- Description: Permanent Buff Effect increasing Lightning Damage from 25% to 200% [Range: Self]
- Electrocharge
- Description: Initiates a phase leading to Electroburst
- Effects: Cancel Effect(s): PATK Down [Range: Self]
- Description: Initiates a phase leading to Electroburst
- Flash Step
- Description: Initiates a phase leading to Flashfoot
- Effects: Varying phase durations ([3 ✖], [7 ✖], [10 ✖])
- Description: Initiates a phase leading to Flashfoot
Map
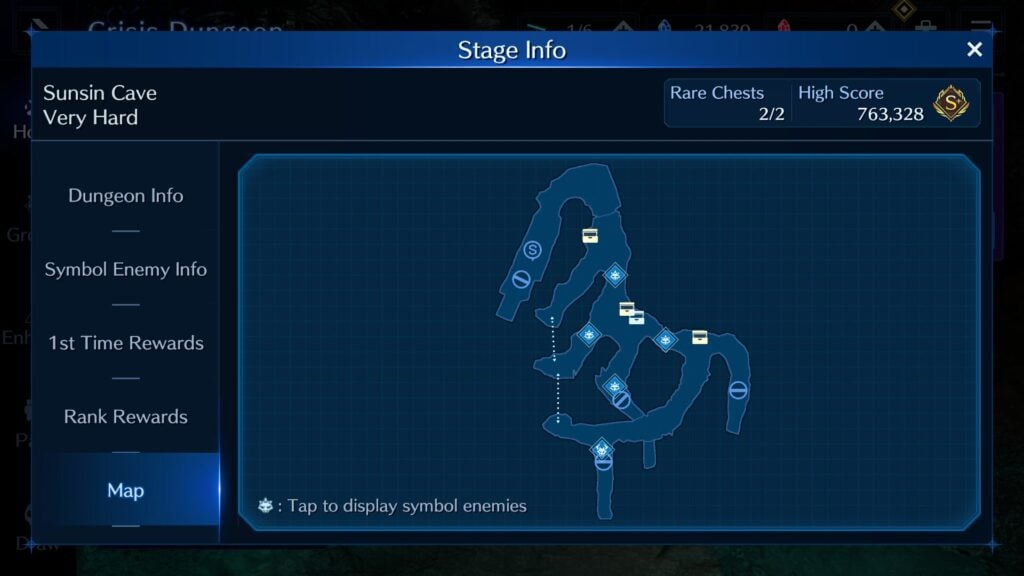
Recommended Clear Order and Trance Abilities
Use Thunder Cocktail (from chest near the boss) → Motorball (Pick PATK/MATK Down Dur. +20s Trance) → Use Thunder Cocktail → Scorpion Sentinel (Pick: Phys and Mag Defense Trance) → Use Fire Cocktail → Sahagin Prince (Pick Healing Potency or Physica Attack Trance) → Use Fire Cocktail → Gallonbaloir (Pick Ice Potency + 30%) → Use Blizzard Cocktail → Reno
Battle Notes
Motor Ball can't be debuffed in any way, so it's best to engage it from the start to prevent it from becoming too strong. Focus solely on staggering it, surviving its attacks, and dealing damage. Dealing damage might be challenging since its defenses cannot be debuffed, even if you bring a lightning damage dealer. Utilize this opportunity to accumulate some summon gauge on Shiva for the upcoming boss fight.
Next, prioritize the Scorpion Sentinel to prevent it from gaining excessive strength. At higher levels, it has the potential to eliminate your characters with a single Tail Laser shot. Summon Shiva immediately at the start to target the two accompanying mobs. Afterwards, concentrate on buffing the targeted character to enhance its survivability against the Tail Laser. Additionally, debuff the Sentinel's Magical Attack to increase your chances of survival.
Sahagin Prince and Gallonbaloir pose slightly less difficulty compared to the initial two encounters. Dispatch the Prince and his minions by utilizing Ifrit's AoE attack, and they should go down without requiring further support. Gallonbaloir can be managed easily as long as you swiftly deplete its gauge. As a reward, it grants an Ice Potency trance ability that significantly aids in the Reno fight.