Table of Contents
Enemy Info
| Image | Name | Notes | Weakness | Resistance | Sigils |
 | Domadoha | Immunities: None Inflicts MDEF Down with Double Claw, and subsequently uses the non-elemental magic attack Oppressive Breath on that same target. Physical attacks are effective against this enemy. | Water, Wind | ||
 | Electro Rangda | Immunities: Poison At the start of battle, uses the lightning-element magic attack Thunder Dance. Physical attacks are effective against this enemy. | Water | ||
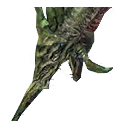
 | Blue Dragon | Immunities: Darkness / Silence / Stun / Fog / MDEF Down Uses many ice-element magic attacks including Blue Dragon Screech. Inflicts fog with Fog Breath. | Fire | ||
 | Red Dragon | Immunities: Darkness / Silence / Stun / Fog / DEF Down Uses many fire-element magic attacks including Red Dragon Screech. Inflicts fog with Fog Breath. | Ice | ||
 | Motor Ball | Immunities: Poison / Darkness / Silence / Stun / Fatigue / Fog / ATK Down / DEF Down / MATK Down / MDEF Down Uses the powerful fire-element magic attack Rolling Fire. Becomes more aggressive the more time has passed during stream phase. | Lightning | ||
 | T M.O.T.H. Unit | Immunities: Poison / Darkness / Silence / Fatigue / Fog / DEF Down / MDEF Down Uses many lightning-element magic attacks. After a certain amount of time or when HP falls below a certain amount, its Charge Level increases and it grants itself Lightning Potency Up. | Lightning, Water | ||
 | Baloir King | Immunities: None Uses water-element magic attacks including the powerful multi-target attack Water Surge. Calls additional allies to battle, and becomes aggressive when allies are defeated. Magic attacks and multi-target attacks are effective against this enemy. | Earth |
Team Building Guide:
This crisis dungeon presents a bit of a challenge when it comes to assembling a team. The final boss, Baloir King, is only weak to earth, and currently, there isn't a clear damage dealer in the game for earth. We expect that weapons and gear for earth damage will be available in future updates, but for now, we're stuck using Quake and Quake Blow materia.

However, the two bosses before the final one are weak to lightning, so I brought Cloud for his lightning damage mastery. I placed a Quake Blow materia in the second slot and a Ruin Blow Triangle in the third slot for breaking sigils. You can also choose to bring ice and fire materia for the dragons, or a Circle Ruin Blow materia.
With our damage dealer secured, we can bring a healer like Aerith, Tifa, or Red. In my case, I chose to bring Aerith because she's the only one I've invested in. I also brought Tifa for her debuffing limit break and offensive debuffs, and I built her with a bit of damage in mind.
Walkthrough:
Right at the start of the dungeon, you'll receive some cocktails. You can pick whichever you like, but I recommend not using them. The dragons at the beginning are quite easy to defeat, and using the cocktails will count against your final score.

Head to the left and open a chest containing 6 supplements and 6 potions. The supplements will come in handy later when your party's max HP has been reduced. It's best not to use the potions since you have Aerith to heal your party.
Blue and Red Dragon
Next, you'll encounter a trash mob battle. Quickly dispatch them and then choose between the ice dragon or the fire dragon. The red dragon is to the south, and the blue dragon is to the north. Focus on hitting the red dragon with ice attacks and destroying his circle sigils, and it should go down swiftly. Upon defeating it, you get to choose among three trance abilities: a 5% increase in physical attack, a 5% boost in magical attack, or a 10% increase in physical attack with a trade-off of -15% physical and magical defense. I recommend selecting the relevant offensive stat for your DPS, but if you're feeling daring, you can opt for the larger offensive bonus.

The blue dragon requires the same strategy, albeit it is weak to fire attacks. After defeating it, you can choose from among these trance abilities: a 5% increase in physical attack, a 5% boost in magical attack, and a 10% increase in magical attack with a trade-off of -15% in physical and magical defense. I would still recommend choosing the safer options.

Head left, and you'll come across stimulants and supplements. Choose either one and continue moving further west. You'll encounter a trash mob; dispose of them quickly and then open the rare chest. Afterward, you can either fight Motor Ball or the T.M.O.T.H. Units. I recommend taking on the twins first, so you won't have a harder time dealing with them if you fight Motor Ball first.
T.M.O.T.H. Units
The Moth Units are weak to lightning and water. Cloud can make quick work of them. Just focus on one and then the other. They cannot be defensively debuffed, but you can lower their attack. Be cautious of their high voltage attack, which is a lightning-based attack that hits the entire party. Make sure to be prepared to heal your party afterward.

After defeating the moth units, you can choose from the following trance abilities: a 5% increase in physical attack, a 5% boost in magical attack, or a 10% rise in physical attack coupled with a 15% reduction in both physical and magical defense. Personally, I'd still opt for the two safer choices.
Head south and then east to collect Thunder and Quake cocktails. You might want to use the Quake cocktail on your Earth DPS character before facing the final boss. Now, head north to confront the Motor Ball.
Motor Ball
The battle will begin with Motor Ball casting Gear Boost. To defeat it, focus on destroying the sigils, and this should stagger the boss. Once interrupted, unleash Ramuh and your most potent lightning attacks. This should bring Motor Ball down quickly. Now, it's time to choose your trance ability again. Your options are a 5% increase in physical attack, a 5% boost in magical attack, or a 10% boost in magical attack at the cost of a -15% reduction in physical and magical defense. I'd still recommend choosing the safer options.

Head north and open a chest containing three supplements. This is the perfect time to use them to restore the party's max HP. You can also use a Quake cocktail if you prefer. I used one and still achieved an S+ rank.
Baloir King
Begin the fight against Baloir King. It's not particularly threatening if you have Tifa to debuff its magic attack. Just be cautious of its water surge attack. Save your ATB on your healer so they can immediately heal after this attack. Eventually, Baloir King will summon Baloir Knights. I suggest killing one and letting the other one live. Baloir King will then start casting 'Aggravated.' Destroy the sigils, and you should interrupt it. Hit it with your best Earth attacks, and it should go down.

Congratulations! You should be able to achieve an S+ rank.

This concludes the guide. I hope you found it helpful!