Table of Contents
In this article, I'll guide you through the La Paina Dungeon in Normal Mode. Let's start by discussing the enemies you'll encounter in this dungeon.
Enemies:
| Image | Name | Notes | Weakness | Resistance | Sigils |
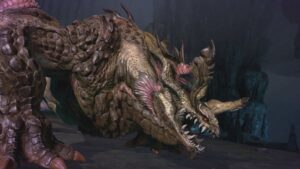
 | Deenglow | Immunities: None Inflicts MDEF Down with Double Claw, and subsequently uses the ice-element magic attack Frigid Breath on that same target. Physical attacks are effective against this enemy. | Fire, Wind | Ice, Earth | None |
 | Zu | Immunities: MDEF Down Uses wind-element physical attacks. Grants self Wind Potency Up and Physical Resistance and inflicts Wind Resistance Down on self with Blusterous Veil. Physical attacks are effective against this enemy. Magic attacks are effective for destroying sigils. | Wind | Earth | |
 | Behemoth | Immunities: Poison / Darkness / Silence / Stun / Fatigue / Fog / DEF Down / MDEF Down Frequently grants self ATK Up with Furious Tantrum. Counters magic attacks during Alert. Physical attacks are effective during Alert. | None | None | |
 | T M.O.T.H. Unit | Immunities: Poison / Darkness / Silence / Fatigue / Fog / DEF Down / MDEF Down Uses many lightning-element magic attacks. After a certain amount of time or when HP falls below a certain amount, its Charge Level increases and it grants itself Lightning Potency Up. | Lightning, Water | None | None |
 | Airbuster Prototype | Immunities: Poison / Darkness / Silence / Stun / Fatigue / Fog / ATK Down / DEF Down / MATK Down / MDEF Down Inflicts DEF Down to all targets with EM Field. Tankbuster's potency is based on the time it takes to interrupt the stream phase. | Lightning, Wind | Fire, Earth |
Team Building Guide:
Since most of the enemies in this dungeon are weak to wind, I recommend bringing Aerith with the Prism Rod and Sephiroth with Dark Heavens as your primary choices. If you don't have these characters, you can opt for your favorite damage dealer and equip them with the Aerora or Aerora Blow materia.


Don't forget to bring a healer along; Aerith can serve this role if needed. For the remaining slots, consider adding a debuffer or another damage dealer to balance your team. Keep in mind that some of the enemies in the dungeon are weak to lightning, so make sure to equip your damage dealer with the appropriate lightning materia for future encounters.
Permanent Rewards:
200 Blue Crystals

5x Grindstone Chunks

Aero Blow Materia

Walkthrough:
As you enter the dungeon, head east and open a chest that contains 200 blue crystals. Afterward, backtrack to the entrance and head south to confront the first boss, a symbol boss called Zu. Dispatch it quickly by using wind attacks, as it's particularly vulnerable to them. You can also debuff this boss's defense to bring it down faster.
Zu

Upon defeating Zu, you'll have the opportunity to choose one of the following trance abilities: Lightning Resistance +30%, Healing Potency +30%, and MDEF Up Duration +20s. I recommend selecting Lightning Resistance since it will be relevant for two out of the three remaining bosses you'll encounter in the dungeon.
Don't forget to pick up the items in the chest near the boss, which contains 5x supplements and 6x potions. You'll also encounter a group of trash mobs in this area. Quickly eliminate them by using wind attacks. Continue south, and you'll reach the final boss. However, don't engage it just yet. Instead, grab the items from the blue chest, which includes 5 grindstone chunks.
T.M.O.T.H. Units

Head north and face two T.M.O.T.H. units. Your earlier choice of Lightning Resistance will be useful against them. Hit them with lightning attacks, and they should go down quickly. After defeating them, you'll have the opportunity to choose one of these trance abilities: Physical Defense +30%, Healing Potency +30%, or MDEF Up Duration +20s. I recommend selecting Physical Defense +30% for the upcoming battle. Also, make sure to collect the items from the chest a bit to the north, which contains 4x Magic Jelly and 5x supplements. Also, there's an Aero Blow Materia to the east. It's just on the ground and not inside a chest.
Behemoth

Continue heading north to confront Behemoth. It relies heavily on physical attacks, so the physical defense boost will prove valuable. If you brought a character with debuffing abilities, consider using it to lower Behemoth's physical attack. Since Behemoth has no elemental weakness, hit it with your most potent attacks. Upon defeating Behemoth, you'll be able to choose one of these trance abilities: Physical Attack +20%, Magical Attack +20%, or Physical Attack/Magical Attack +10%. I suggest opting for Physical Attack +20% if your team consists of physical attackers, and go for the magical bonus if that's not the case.
Airbuster Prototype

Now, it's time to face the final boss, the Airbuster Prototype. Before engaging it, ensure that you've healed your party's max HP using items. First, eliminate the two Deenglows accompanying it, and then direct your attacks towards the boss. The Airbuster will attempt to charge up its cannon; interrupt this process by destroying the circular sigils. When it's staggered, hit it with either wind or lightning attacks, and it should go down swiftly.
Congratulations on successfully completing the dungeon on Normal difficulty! I hope you found this guide helpful.